
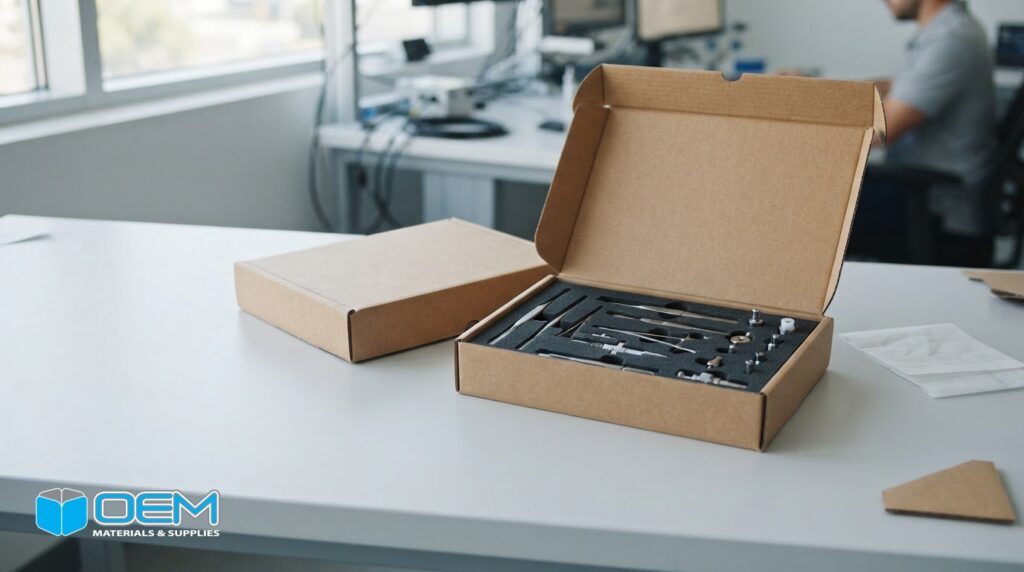
Customization alone doesn’t make packaging suitable for a medical environment. Custom packaging kits for medical devices need materials and protective features selected for the device, its handling, and its distribution conditions. Instrument inserts can help position components and limit movement inside the package, while the outer box provides the structure for storage and shipment.
Choosing custom packaging kits for medical devices involves more than finding a box that fits. The materials must suit the product and its packaging requirements, and the insert should hold each instrument in an organized, stable position. A presentation kit may also be appropriate when components need to be arranged clearly for review or use.
This article explains how to assess material suitability, select instrument inserts, and compare box styles and protective features. It also covers minimum order quantities and presentation kits, helping purchasing and engineering teams define packaging around device dimensions, component layout, and supply needs. Use it as a practical starting point for specifying a kit that protects the contents and supports efficient handling.
Key Takeaways
- Match packaging materials to the device, its handling conditions, and the requirements of its medical environment.
- Plan insert shapes and compartments around each instrument to keep components organized and limit movement inside the kit.
- Compare box construction and protective features based on how the package will be handled, shipped, and displayed.
- Clarify minimum order quantities early, since they can vary with box style and production specifications.
- Use device dimensions and component layout to guide the choice between a functional shipping box and a presentation-ready kit.
Can you provide internal inserts for delicate instruments?
Yes. Internal inserts and dividers can organize instruments inside a medical device kit. Their layout should match each component’s shape, orientation, and access sequence.
Custom Inserts and Dividers
A custom insert separates instruments, accessories, and small components within one package. For example, a kit with a handpiece, cable, and removable tip can have a dedicated space for each item. Dividers create boundaries between components, while shaped inserts hold items in a planned arrangement. Map the kit contents and identify which parts need separate placement or clear visibility during design.
Consider how staff will remove and replace each component. A layout that follows the use sequence can make contents easier to identify and repack. Leave enough room to grasp each item rather than enclosing it so tightly that removal becomes awkward. A physical sample of the complete kit helps teams assess fit, access, and organization before production.
Protective Cavities for Delicate Instruments
Shaped cavities position an instrument by supporting its contours at selected contact points. A cavity for a narrow probe, for example, differs from one for a broad, flat component. Specify the instrument’s orientation and any areas that should not bear pressure. These details guide the cavity shape and help prevent neighboring items from shifting into the instrument’s space.
Precision-cut foam inserts can provide distinct cavities for instruments and accessories. Consider [foam packaging](https://oemmaterials.com/products/foam-packaging/) when a kit needs shaped internal support. Review the device and package layout together, since cavity depth and spacing affect access, component separation, and fit inside the outer box.
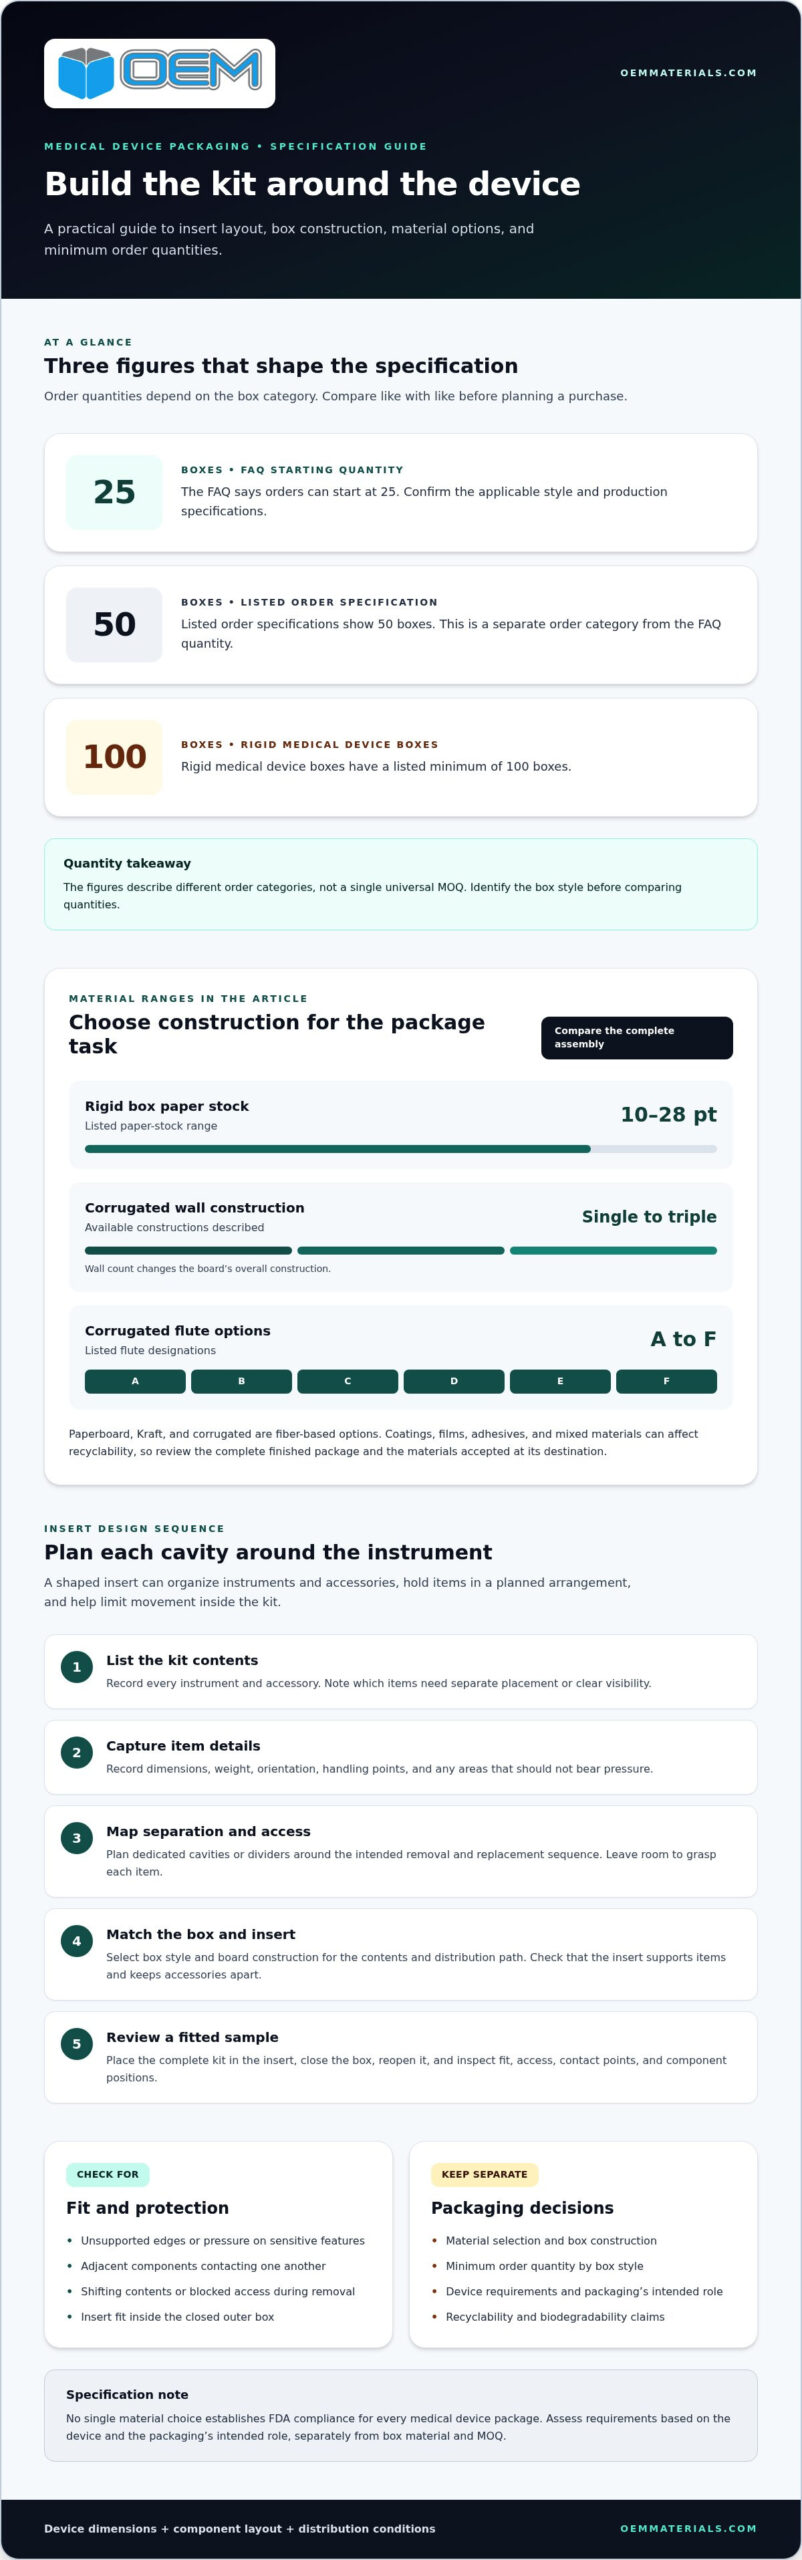
Use a simple design sequence to define insert requirements:
- List every instrument and accessory included in the kit.
- Record each item’s dimensions, weight, orientation, and handling points.
- Mark components that need separation or a dedicated cavity.
- Arrange cavities around the intended removal and replacement sequence.
- Review a fitted sample with the complete kit contents in place.
Evaluate fit as a complete assembly, not as an insert alone. Place each device in its cavity, close the box, then reopen it and inspect the components’ positions. This can reveal a cavity that obstructs access or a divider that fails to keep accessories apart.
For delicate instruments, focus on contact, movement, and removal. Look for unsupported edges, pressure on sensitive features, or contact between adjacent components. Adjust the cavity outline and divider positions to address those specific points before finalizing the insert design.
What is the MOQ for custom medical device boxes?
Minimum order quantities vary by box construction. Listed order specifications show 50 boxes, while an FAQ says orders can start at 25. Rigid medical device boxes have a listed minimum of 100 boxes. These figures describe different order categories, so identify the box style before comparing quantities.
No single material choice establishes FDA compliance for every medical device package. Requirements depend on the device and the packaging’s intended role, so assess them separately from box material and minimum order quantity.
Paperboard, Kraft, and Corrugated Options
Rigid medical device boxes list paper stock from 10 pt to 28 pt. Paperboard provides a formed box structure, while Kraft paper is a paper-based option for packaging components. Corrugated board adds a fluted layer between liners. Listed corrugated constructions range from single-wall to triple-wall, with A to F flute options.
Choose construction based on the box’s contents and distribution path. A small, lightweight component may call for a different package than a heavier device shipped with accessories. Compare the assembled box, insert, and contents together. For corrugated formats, corrugated box options can be considered alongside the kit’s required dimensions and protection.
Strength and Impact Absorption
Material thickness and construction affect how a package resists handling forces. Corrugated flutes create a cushioning structure, while the wall count changes the board’s overall construction. The box must also work with its internal insert: a strong outer package cannot prevent movement if the contents shift inside.
Assess the complete package in practical steps. First, note the device’s dimensions, weight, and fragile areas. Next, choose a box style and board construction suited to shipping and storage conditions. Then check how the insert supports the contents and whether accessories need separation. This process aligns material selection with the actual packaging task.
Recyclability and Environmental Claims
Paperboard, Kraft, and corrugated materials are fiber-based, but recyclability depends on the finished package. Coatings, films, adhesives, and mixed-material components can affect how local recycling systems handle a package. Don’t treat “paper-based” as a complete environmental claim. Review the full construction and the materials accepted at the destination.
Biodegradability is a separate claim from recyclability. Disposal behavior depends on a material’s composition and the conditions, so don’t assume every paper-based box is biodegradable in every setting. For supply planning, record the selected material, box construction, insert type, and order quantity together. This specification gives purchasing teams a consistent basis for comparing packaging solutions and replenishment needs.
Protection during shipping, handling, and retail display
Protection should account for the package’s full route, from packing station to warehouse, carrier, and point of use. Whether shipped domestically or handled internationally by medical supply distributors like IMT Medical Devices, a kit may encounter repeated handling, stacking, and changes in orientation before reaching a healthcare facility.
Match testing to the package’s function and the device’s distribution conditions. For a sealed package, assess seal integrity. For transit protection, evaluate the complete packed unit under relevant handling and shipping conditions.
Damaged packaging can expose a device to contamination, impact, or component movement. Packaging that fails applicable requirements may also affect product acceptance and distribution. Inspect the package condition and protective function before release.
Plan Protection Around the Distribution Route
Start with the route: identify how the package moves through internal handling, storage, and outbound shipping. A carton transferred between warehouse locations needs different review points from a kit packed for parcel delivery. Note stacking conditions, likely contact points, and how staff will identify the package at receiving.
Then review the complete pack. Confirm that the device remains positioned, closures stay intact, and the outer container has no damage that compromises its function. For a kit with several components, verify that accessories remain organized after handling. This inspection connects packaging design with warehouse tasks such as picking, staging, and replenishment.
Testing and Inspection
Build a test plan around the package type and intended use. A package with a sealed barrier calls for seal-integrity evaluation. A shipping carton calls for transit testing that represents its distribution route. Record the package configuration, closure method, and inspection results so teams can compare the tested design with production packaging.
Keep the test sample representative. Use the intended device or an equivalent load, the specified insert, and the final box configuration. Changing the fill, closure, or package dimensions can affect performance. Repeat the review after any design change that affects protection or package assembly.
Display, Printing, and Warehouse Handling
Retail or clinical display adds visibility requirements to physical protection. Printing can make product identification easier at receiving and point of use, while a clear panel layout helps staff distinguish kit contents. Keep printing clear of handling and opening areas rather than crowding closure surfaces.
Lamination may change the package’s surface finish and handling characteristics. Evaluate it as part of the finished construction, especially where labels, closures, or stacking contact the box. Consistent package dimensions and readable identification can support orderly warehouse stacking and faster visual checks.
For final review, compare the packaged device before and after the planned handling sequence. Check the closure, visible damage, internal movement, and readability of essential identification. Document any failure point, then adjust the package structure or packing method and evaluate the revised configuration. This gives purchasing, engineering, and operations teams a shared basis for approving packaging for shipping, storage, and display.
Custom box shapes, styles, and dimensions
Box dimensions should begin with the device and its full contents, not an estimated outer size. Listed custom ranges span 0.75″ to 30″ in length, 0.75″ to 20″ in width, and 1.75″ to 20″ in height. These ranges help frame a design, but the required dimensions depend on the device, insert, and closure.
Measure the packaged configuration. Record the device’s length, width, and height, then account for the insert and any accessories. For example, a compact instrument with a cable may need more interior length than the instrument alone suggests. Leave practical room to place and remove components without forcing them into the box.
Choose a Style for Access and Assembly
Box style affects how a kit opens, closes, and moves through packing operations. A straightforward rectangular carton can suit a device and insert loaded from one end. A box with a wider opening may make a multi-component kit easier to access. Choose the opening and closure to suit the packing sequence and user access.
Review the box style with the insert, not as a separate component. Check that the insert clears the closure and stays in position when the box opens. A sample assembly can reveal whether staff can pack the kit consistently and retrieve each component without disrupting the rest.
Coordinate Branding and Production Details
Printed branding can help distinguish a kit and make its contents easier to identify. Plan the placement of product names, handling information, and visual identifiers around the box’s folds and openings. Choose colors that remain legible against the background, and keep essential text clear of creases and closure areas.
Design decisions can affect production turnaround. Confirm dimensions, box style, insert fit, and print layout together before approving the final specification. Revising artwork after setting the structure may require another review of the assembled package. A clear specification gives purchasing and production teams a consistent reference for repeat orders.
Use this design sequence to move from measurements to an approved package:
- Measure the device and every component included in the kit.
- Define the insert’s footprint and the space needed for access.
- Select a box style that supports the loading and opening sequence.
- Position branding and colors around folds, closures, and readable areas.
- Review a complete sample before approving the production specification.
Dimensional accuracy also supports warehouse planning. A box that closely fits its contents can reduce unnecessary void space, while consistent outer dimensions simplify storage and packing layouts. Compare the proposed package with shelf, tote, and shipping-carton constraints before final approval. If the device, insert, or accessory set changes, revisit the dimensions and style instead of relying on an earlier configuration.
Custom boxes and presentation kits for medical devices
Design custom packaging kits for medical devices by first defining the contents, intended presentation, and packing sequence. Evaluate the assembled package for fit, access, closure, and the position of each component inside the box.
A presentation kit protects its contents and makes them easy to identify. For example, a diagnostic instrument, cable, and accessories can be arranged in distinct positions. The outer box should support that layout and open to provide a clear view of the contents.
Balance Presentation with Function
Start with the user’s first interaction. Decide whether the box opens from the top or side, or uses a hinged presentation format. Align the insert and component placement with that opening. A layout that looks orderly when closed may make smaller accessories difficult to reach if the instrument blocks access.
Choose a finish and printed design suited to the package’s purpose. A restrained color palette can distinguish product information from handling instructions. Keep critical text readable and clear of folds and closure areas. Presentation should clarify the kit without complicating packing.
Design and Validate the Complete Kit
Use a practical review sequence. First, list the device and every accessory in the kit. Next, establish the box style and internal layout. Then assemble a sample with the intended contents and inspect the fit, appearance, and ease of removal for each item. Record collisions, blocked access, or loose components for correction.
Review the complete package from both engineering and operations perspectives. Engineering can assess whether the arrangement suits the device, while packing staff can confirm that the sequence is repeatable. For example, a cable crossing the instrument’s placement area may slow packing or obscure the presentation. Adjust the layout before finalizing the box specification.
Plan packaging options around actual use, not appearance alone. A sensitive instrument may need a protective insert beneath a presentation layer, while a training kit may prioritize visibility and orderly access. Make the finish, box structure, and internal arrangement work together. For support with structure and layout decisions, explore custom packaging design.
Before approving production, compare the sample with the intended configuration and confirm the selected finish, colors, and opening sequence. Document the approved layout so purchasing and operations teams have a consistent reference for managing future package revisions.
OEM Materials & Supplies: Corrugated Boxes
OEM Materials & Supplies helps teams match corrugated boxes and packaging kits to medical device dimensions and handling needs. Turn to custom packaging when a standard carton does not fit the device, insert, or packing workflow. Foam packaging can support a fitted interior, while a corrugated outer box provides structure. The right configuration depends on the device, components, and distribution requirements.
For a kit with several instruments, define the contents and package layout before selecting the box. Share device dimensions, weight, insert needs, and expected usage to make the discussion practical. OEM Materials & Supplies can help you consider corrugated box options alongside the kit’s protective requirements.
Contact OEM Materials & Supplies to discuss your packaging needs, or visit oemmaterials.com.
Put the Packaging Specification into Action
The next step is to turn design decisions into a working specification that purchasing, engineering, and operations can use consistently. Assign an owner for the approved version and define how updates will be reviewed when a device, accessory set, or packing process changes. This keeps future orders aligned with the package teams evaluated.
For custom packaging kits for medical devices, a clear project brief gives the conversation a practical starting point. Include the intended use, key design priorities, and production or distribution constraints that could affect the package. This shared context helps teams focus on a design that fits the product and workflow, rather than treating the box as an isolated component.
When you’re ready to discuss the packaging requirements, contact OEM Materials & Supplies with your project details. A well-defined starting point can help move the next packaging decision forward with clarity.
Frequently Asked Questions
Are the materials suitable for medical environments?
Materials can be selected for a medical device’s packaging function, but material choice alone doesn’t establish suitability. Consider the device, how it is handled, and whether the package contacts the product or serves as an outer shipping container. For example, a corrugated box can protect a kit during distribution, while the device’s specific packaging needs require separate assessment. Specify the intended use before selecting materials.
Are these boxes suitable for sterile products?
A box can serve as secondary packaging for a sterile product, but an ordinary box should not be treated as the sterile barrier. The sterile barrier is a separate packaging system that maintains the product’s sterile state until use. For example, a sealed pouch may contain the device, with a corrugated carton protecting it during storage and shipment. Keep these packaging functions distinct in the specification.
What types of custom packaging kits are used for medical devices?
Common configurations combine a corrugated box, a fitted foam insert, and designated spaces for accessories. A kit for a diagnostic instrument, for instance, could hold the instrument, cable, and reusable components separately. OEM Materials & Supplies offers Corrugated Boxes, Foam Packaging, and Packaging Kits for these needs. Manufacturers in Orange County, Los Angeles, San Diego, and Riverside can define a package around their specific device and workflow.
Which materials are suitable for sterile medical device packaging?
Material suitability depends on the sterile barrier design, device, and sterilization process. A corrugated carton typically functions as an outer protective package, not as the barrier that maintains sterility. For example, a sealed barrier package can sit inside a protective carton for distribution. Specify the device’s packaging requirements and intended process before choosing materials, and assess the complete packaging system rather than relying on the outer box alone.
How do packaging kits protect devices during shipping and handling?
A kit protects a device by combining a suitable outer container with internal support that limits shifting and contact. For example, a shaped insert can keep a handpiece and its cable from moving into each other during transport. The package should also suit its warehouse and carrier route. Review the complete packed kit after handling, checking for closure damage, displaced components, and visible impact to the device.
What are typical minimum order quantities and lead times for custom medical packaging?
Minimums and production timing vary by box style and order specification. Published examples list orders starting at 25 boxes, a 50-box minimum in order-volume specifications, and a 100-box minimum for rigid medical device boxes. Listed production timings include 4–6 business days for rigid boxes, 8–10 business days for standard production, and 10–15 business days for other orders. These are distinct examples, not a single universal schedule.