
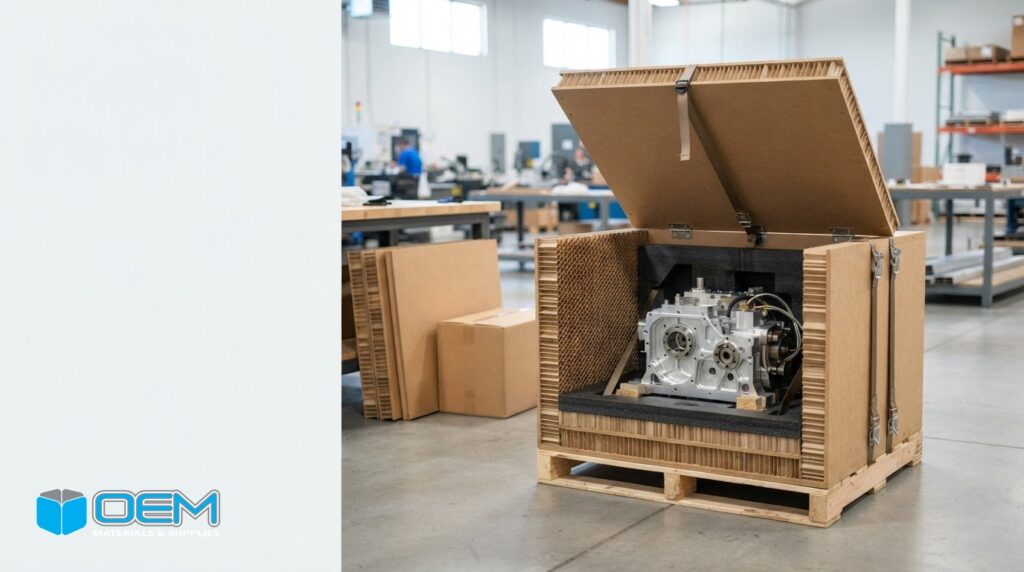
More material does not always make a crate more effective. Lightweight honeycomb panels for crating offer a low-weight option when a design must protect a product without adding unnecessary load. The right panel size and thickness depend on the item, support points, and transport and storage demands.
That balance matters to purchasing, engineering, and warehouse teams managing shipment protection, handling effort, and storage space. A panel that is too light for its application may not support the load adequately, while an unnecessarily heavy design adds weight to every move.
This article explains how custom honeycomb panel dimensions and thicknesses can suit crates, storage compartments, and protective packaging. It covers the design factors that influence panel selection and how lighter packaging can meet transport needs. Use it as a practical starting point for matching a panel to the product and its journey, rather than choosing by thickness alone.
Key Takeaways
- Match panel dimensions and thickness to the product, support points, and handling demands rather than selecting by thickness alone.
- Consider how honeycomb panels can form crate walls and storage compartments while balancing structural support with transport weight.
- Use factors such as cell size, material depth, and cell-wall thickness to shape a panel specification for its application.
- Evaluate the full packaging design, including the product’s protection needs and how the crate will be stored and moved.
- Compare panel crating with corrugated boxes or foam packaging when deciding how to protect products through shipping and handling.
Applications in boxes and storage compartments
Honeycomb panels can form crate walls, dividers, and compartment surfaces when a design needs stiffness without relying on solid, heavy board. Aluminum honeycomb panels use two aluminum sheets with honeycomb-shaped cells between them. In a reusable transport case, for example, panels can separate components and create bays for tools, instruments, or assemblies.
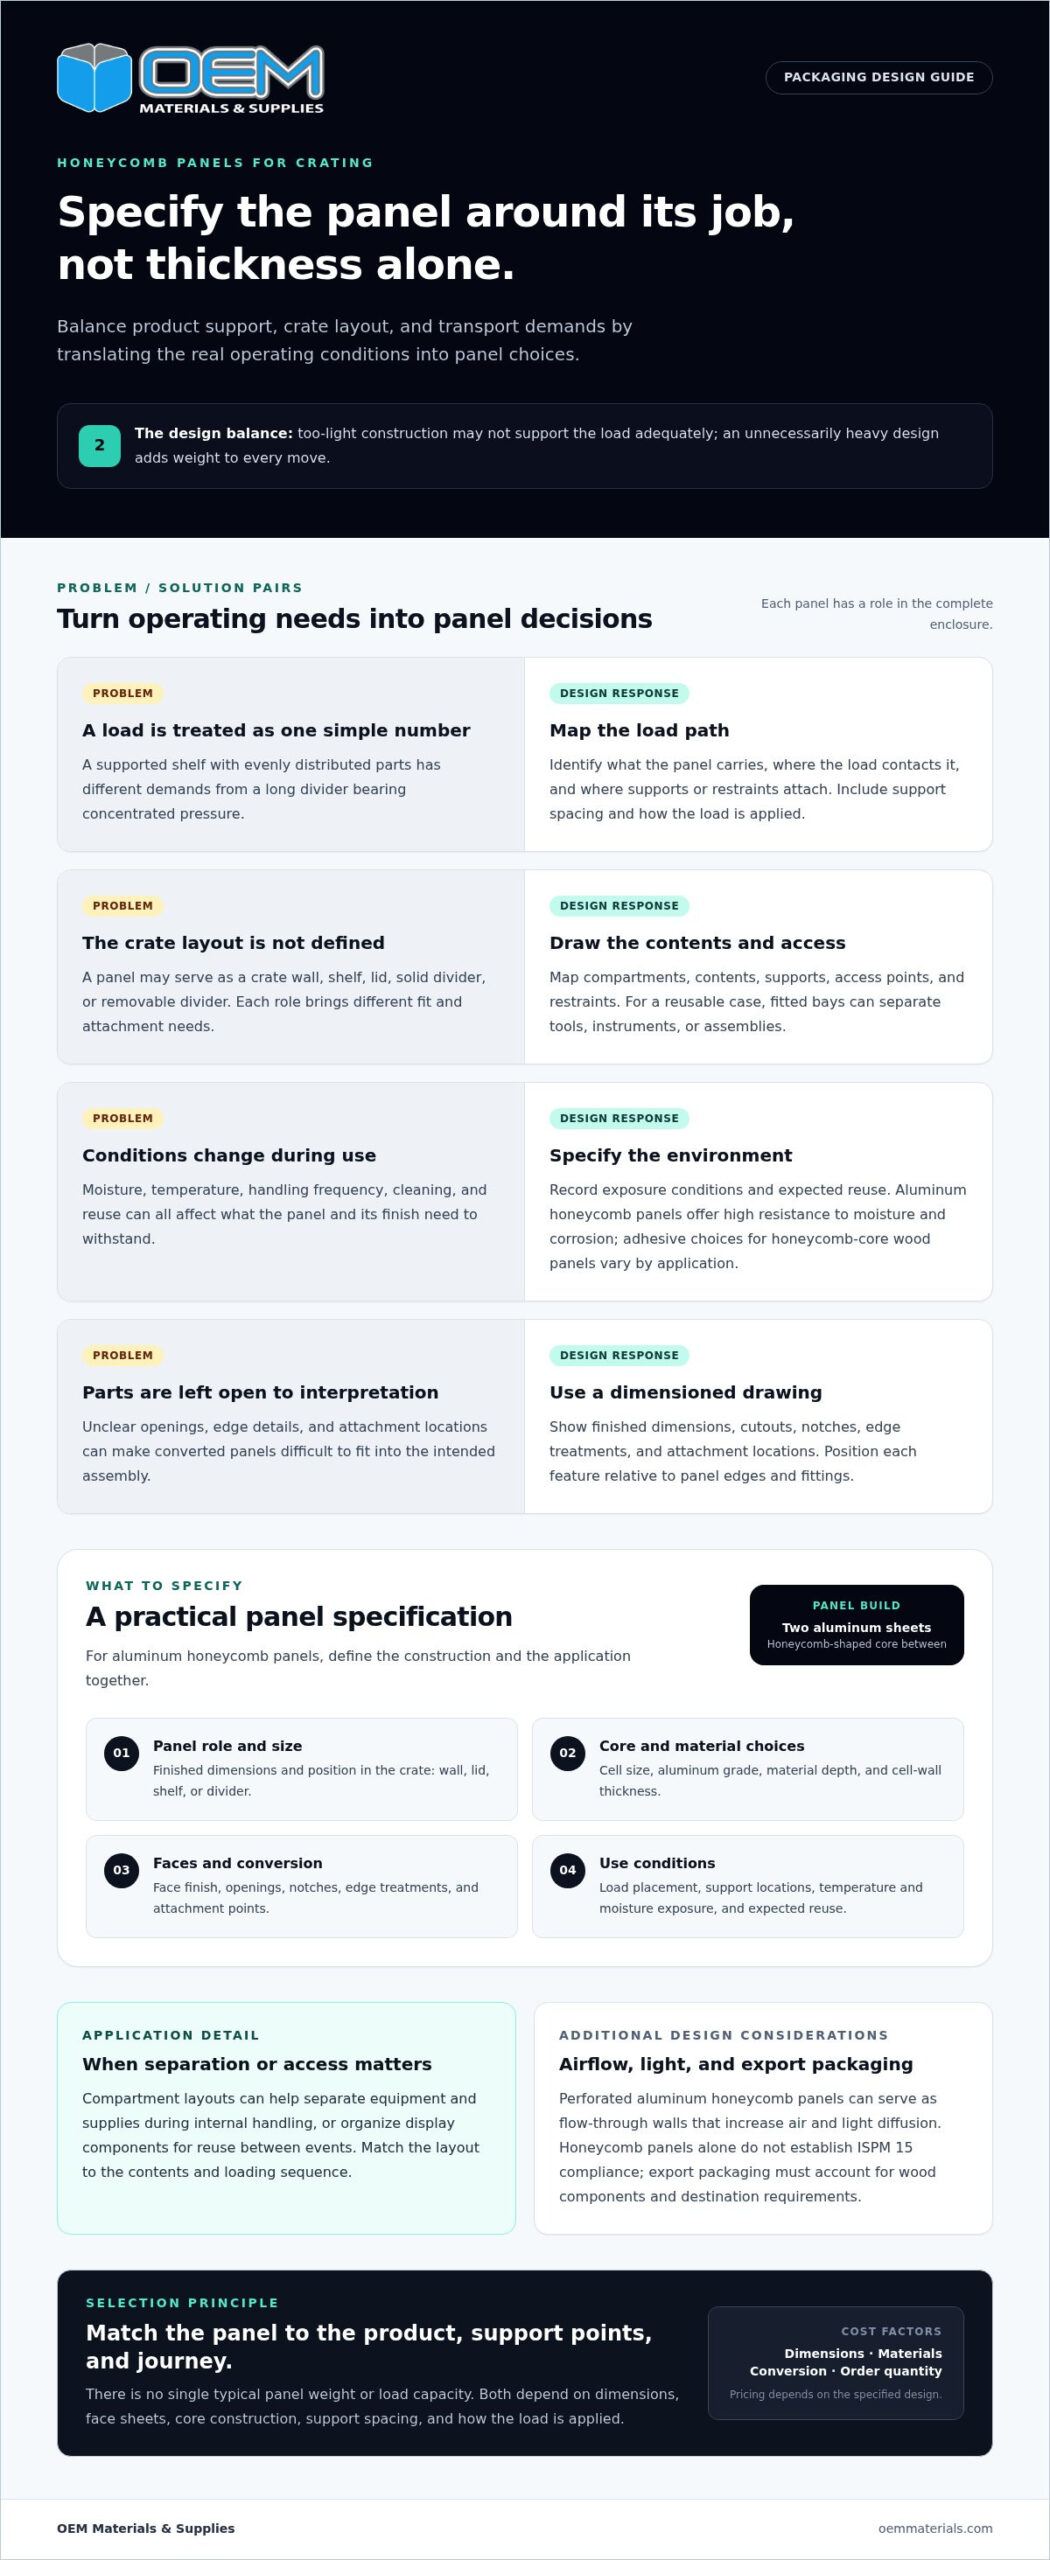
There is no single typical weight or load capacity for honeycomb crating panels. Both depend on panel dimensions, face sheets, core construction, support spacing, and how the load is applied. A supported shelf holding evenly distributed parts faces different demands from a long divider bearing concentrated pressure. Specify the contents, contact points, and handling conditions to select a panel suited to the application.
Start panel selection with the load and the job. For a crate wall, consider the product’s mass and where restraints or fittings will attach. For a storage compartment, assess shelf span, supports, and frequency of access. A small electronics assembly and a large equipment component create different demands, even when their outer dimensions are similar. The panel’s role in the complete enclosure matters.
Healthcare settings may need compartments that keep equipment and supplies separate during internal handling. A case carrying diagnostic instruments, for example, can use fitted bays to limit contact between items. Tradeshow teams may use lightweight panels in transport cases for display components, then reuse the compartments between events. In either application, match the layout to the contents and loading sequence.
Retail and hospitality operations can use compartmented packaging to organize replacement fixtures, signage, or service components. A hotel renovation kit, for example, might separate room hardware by installation area. Architectural applications include interior panels and built elements where lighter construction is useful. Aluminum honeycomb panels also appear in aircraft, boats, and other structures, demonstrating uses beyond shipping crates.
In aluminum panels, the honeycomb structure traps air, helping insulate and reduce heat and sound transmission. This can matter for a storage enclosure near temperature-sensitive equipment or a partition where sound transfer is a concern. Perforated aluminum honeycomb panels can serve as flow-through walls that increase air and light diffusion, making airflow and visibility part of the design decision.
Before specifying a panel, map each compartment and mark its contents, supports, access points, and restraints. Then assess whether the design needs a solid divider, a shelf, or a protective enclosure. This helps distinguish a packaging requirement from a broader architectural or equipment-panel application and keeps panel selection tied to the actual load path.
Customizable honeycomb panel specifications
A useful specification turns the crate’s operating requirements into measurable panel choices. For aluminum honeycomb panels, key variables include cell size, aluminum grade, material depth, and cell-wall thickness. Specify these alongside the panel’s role, such as a side wall, lid, shelf, or removable divider. The goal is to match the construction to how the crate will be loaded and handled.
Honeycomb panels can be incorporated into export shipping crates, but the panels alone don’t establish ISPM 15 compliance. The export packaging design must account for any wood components and the destination’s requirements.
In the United States, the cost of honeycomb panels for crating depends on dimensions, materials, and conversion requirements. Cutouts, edge work, and order quantities can also affect the quote. Pricing is provided after a quote request.
Moisture, temperature, and reuse should shape the specification. Aluminum honeycomb panels offer high resistance to moisture and corrosion, while adhesive selection for honeycomb-core wood panels varies by application, including high-strength, high-temperature, and low-temperature options. For repeated use, include expected handling and inspection needs in the design discussion.
Panel faces and finishes should suit the crate’s environment and handling process. A panel that will be loaded and unloaded frequently, for example, may need different surface considerations from one enclosed inside a stationary storage compartment. Identify contact points, exposure conditions, and cleaning needs before selecting the finish.
Custom cutting and conversion start with a dimensioned drawing. Identify finished panel dimensions, openings, notches, edge treatments, and attachment locations. For a crate side with a handle opening, show its position relative to the edges and fittings. For a divider, specify how it meets the surrounding structure. Clear drawings help translate the design into parts that fit the intended assembly.
A practical specification package can include:
- Panel dimensions and position in the crate.
- Cell size, aluminum grade, material depth, and cell-wall thickness.
- Face finish and required cutouts or edge treatments.
- Temperature and moisture exposure, plus expected reuse.
- Load placement, support locations, and attachment points.
These details help engineering and procurement teams compare panel options consistently. If the crate design changes from a fixed enclosure to a removable-panel case, for example, attachment and edge requirements may change too. Review the drawing against the product layout and operating conditions before releasing the specification for fabrication.
Panel thicknesses and sheet sizes
Panel thickness affects how much space the crate uses and how much usable room remains inside. If exterior dimensions must stay fixed, thicker walls reduce interior clearance. If the product envelope must remain unchanged, thicker walls can increase the crate’s outside footprint. Decide which dimension is fixed before settling on panel thickness.
Thickness also affects closure and fit. A lid that sits within a crate rim needs enough clearance to close without binding. A lid that covers the outside changes the crate’s profile. For a case with a close-fitting cover, assess the assembled geometry rather than considering the lid panel alone.
Compare thickness choices by crate function. A removable access panel may need to remain manageable for workers during repeated opening, while a fixed enclosure is assessed as part of the assembled structure. A panel used in a storage system may also need to fit existing shelves or floor space. These operating constraints can narrow the suitable options before fabrication.
Sheet-size planning should account for the complete set of crate parts. A design with long sides, short ends, a base, and a lid may use panel area differently from a compact case with several partitions. Reviewing the parts together can help avoid mismatched dimensions and unnecessary variation between panels. It also gives production teams a clearer view of the material layout.
For warehouse operations, outside dimensions matter beyond the individual crate. A change in panel thickness can affect how multiple units fit on a pallet, in a storage bay, or in a vehicle. If crates must stack, assess the assembled package footprint and contact surfaces. Confirm that the chosen layout works with existing storage and handling processes.
Use a simple comparison before finalizing the panel size:
- Identify whether interior clearance or exterior footprint is fixed.
- Check lid closure and access with the assembled crate geometry.
- Review the full panel set as one material layout.
- Compare crate dimensions with storage, pallet, and vehicle constraints.
- Confirm that the selected design suits handling and repeated access.
This approach keeps thickness and sheet size tied to packaging operations, not just the individual panel. A crate that fits the product but exceeds the warehouse’s designated storage footprint, for example, creates a downstream handling issue. Aligning panel dimensions with the product, crate closure, and facility layout helps prevent that mismatch. Review final selections as part of the assembled package, including how staff store, access, and move it.
Lightweight transport and payload efficiency
Crate weight affects the total load moved through a shipment. A lighter panel design can reduce packaging tare weight, leaving more of the shipment’s allowable capacity for the product. The practical result depends on the complete crate, including its base, frame, restraints, and protective inserts, not the panels alone.
Compare the existing package with the proposed design component by component. Record the current crate’s empty weight, product weight, outside dimensions, and loading arrangement. Then identify which parts can use honeycomb panels without compromising support or protection. Replacing a solid side wall may affect tare weight, for example, while changing the base could alter how the load transfers to a pallet.
Transport mode shapes the design. A shipment moving by truck may prioritize efficient trailer-space use and straightforward handling. An air shipment may place greater emphasis on package weight and external dimensions. In either case, the crate must protect the product through loading, transit, and unloading. A lighter package is useful only when its structure suits those demands.
Think of the crate as a composite assembly. Panel faces and the honeycomb core work alongside joints, edge supports, and fasteners. If a panel spans between supports, the span and the load’s position affect how the assembly performs. Concentrated equipment feet, for instance, transfer force differently from a product resting evenly across a supported base.
Payload efficiency also depends on the shipping plan. A large crate with unused interior space can consume transport volume even when its panels are light. Measure the packed product, protective clearance, handling access, and exterior crate dimensions together. A tighter layout may reduce wasted space, but it must preserve room for restraints and safe loading.
For repeat shipments, review the design against actual operating conditions. Track package tare weight, product configuration, damage observations, and changes in handling equipment. If a crate returns for reuse, inspect panel edges, joints, and attachment points before loading it again. This practical feedback can show where the design uses unnecessary material or needs more support.
- Compare package tare weight and exterior dimensions with the current design.
- Map concentrated loads, support points, and restraint locations.
- Assess the complete crate, including base, frame, and hardware.
- Match the layout to transport mode, loading access, and product protection.
In shipping operations across Los Angeles, Orange County, San Diego, and Riverside, these checks help teams compare panel choices with real shipment requirements. The objective is not to minimize packaging weight at any cost. It is to balance protection, usable payload, package dimensions, and handling needs throughout the transport cycle.
Lightweight crating and protective packaging
Protective packaging combines the crate structure with the surfaces and supports that contact the product. A sound design coordinates panel walls, restraints, and cushioning around the item’s handling risks.
For lightweight honeycomb panels for crating, the practical goal is to reduce unnecessary package mass while preserving support and product protection throughout the shipment.
Lightweight Crating
Lightweight crating uses panels and supporting components selected for the product, rather than adding material uniformly to every side. A crate carrying a machine assembly, for example, needs a base and restraint points suited to its weight and shape. Review panel spans, edges, joints, and handling access together to understand how the complete crate will behave during loading and movement.
Protective Packaging
Protective packaging addresses contact, movement, and exposure inside the crate. Foam packaging can cushion a component, while fitted compartments can keep separate parts from striking each other. Map the product’s vulnerable surfaces, then position support and cushioning where movement could cause contact. A complete packaging kit can organize protective components for a repeatable packing sequence.
Start the design review at the product surface. Identify painted, polished, machined, or otherwise sensitive areas that should not rub against the crate wall. Then consider how the item is loaded and restrained. A long metal part may need support at defined points, while a fragile instrument may require cushioning that limits movement without pressing on controls or connectors.
Plan closure and restraint details as part of the protective system. A lid that shifts during handling can expose the contents, while poorly placed restraints can press against sensitive features. For a reusable equipment case, map the closure points and restraint paths, then check that staff can secure and release them without contacting the product. This makes access and protection part of one coordinated design.
Build the protection plan around the likely damage mechanism. To prevent abrasion, separate the product from hard crate surfaces. To limit shifting, use fitted supports and restraints. For impact exposure, consider cushioning at contact points and verify that the crate structure protects those areas. A foam insert shaped around a component can help hold it in position, while a divider can prevent adjacent parts from touching.
Before packing, confirm the product orientation, restraint locations, cushioning placement, and removal sequence. A crate should protect the item in transit and let warehouse staff unpack it without pushing tools against sensitive surfaces. Record the packing arrangement so repeat shipments use the same protective layout and inspection points.
For a project review, document the product dimensions, weight, exposed surfaces, handling method, and shipping environment. These details connect panel construction to the protection strategy and help identify where cushioning, restraints, or compartments belong.
OEM Materials & Supplies: Corrugated Boxes
OEM Materials & Supplies can help when your packaging plan calls for corrugated boxes alongside protective components. Corrugated packaging may suit products that do not require a rigid crate, while foam packaging can cushion items inside a box or shipping assembly. Packaging kits can bring compatible components together for a consistent packing process.
A manufacturer shipping smaller assemblies, for example, could use a corrugated box with foam protection, while reserving a crated design for heavier or irregularly shaped equipment. The right format depends on product dimensions, weight, handling, and shipping conditions. Sharing those details helps guide a practical packaging recommendation.
Contact OEM Materials & Supplies to discuss corrugated boxes and protective packaging for your operation.
Plan the next packaging iteration
A packaging review is most useful when it starts with the actual shipment. Gather the product’s dimensions and weight, note how it is handled, and identify recurring damage or loading challenges. These details ground a design discussion about lightweight honeycomb panels for crating in your operation’s needs.
Consider the complete packaging workflow, not only the crate itself. The right design should fit the product, protect sensitive surfaces, and make loading and unloading practical for your team. If shipment conditions or product configurations change, revisit the packaging layout before those changes become routine.
OEM Materials & Supplies can help assess the packaging needs that fit its product offerings. Share product dimensions, weight, and annual usage to give the discussion a clear starting point. Contact OEM Materials & Supplies to discuss your packaging requirements and take the next step toward a packaging plan built around your operation.
Frequently Asked Questions
Why honeycomb boards?
Honeycomb boards provide a panel structure that balances stiffness and weight. The cellular core supports the outer faces, making this construction useful where solid board would add unnecessary mass. For a shipping case with broad side panels, this structure can help manage panel weight while maintaining a rigid enclosure. Selection still depends on the crate’s load path, support arrangement, and how the packaged product will be handled.
What are lightweight honeycomb panels used for in crating?
Lightweight honeycomb panels can form crate walls, lids, dividers, and compartment surfaces. A crate for an equipment assembly might use panels to enclose the product while fitted cushioning controls movement inside. Removable dividers can separate accessories from the main unit, making unpacking simpler. For a custom crating layout, define which parts need enclosure, support, separation, or repeated access before assigning panel positions.
What materials are honeycomb panels made from for shipping crates?
Aluminum honeycomb panels use two aluminum sheets with honeycomb-shaped cells between them. Honeycomb-core wood panels are another construction, with adhesive selected for the application. These constructions serve different design needs, so specify the crate environment, attachment method, and expected handling. A reusable equipment enclosure, for example, may require different materials and interfaces than a one-way shipment.
How strong are honeycomb panels compared with plywood and corrugated plastic?
There is no universal strength ranking among honeycomb panels, plywood, and corrugated plastic. Performance depends on panel construction, thickness, support spacing, attachment details, and load direction. Compare them in the actual crate design, such as a base carrying concentrated equipment feet or a side wall exposed to handling pressure. For packaging teams in Los Angeles, Orange County, San Diego, and Riverside, application-specific load conditions should guide the comparison.
What panel thicknesses and sizes are available for crating?
Panel thickness and sheet size are specified to suit the crate design, rather than selected from a universal dimension. Define each panel’s finished length and width, position, and required openings or edge details. Then relate thickness and core construction to the support span and intended use. A lid, base, and divider may need different dimensions because they fit and function differently within the same crate.
How do you cut, join, and assemble honeycomb panels into a shipping crate?
Plan cutting and assembly from a dimensioned crate drawing. Mark each panel’s finished size, openings, edges, and attachment locations, then show how the panels connect to the frame or adjacent components. During assembly, preserve the planned support and attachment points, and check that the product fits with its restraints and cushioning. A trial fit with the actual product or a dimensionally accurate mock-up can reveal clearance issues before shipment.